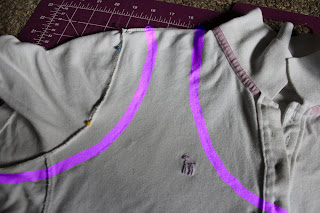
I had a dress code my 8th grade year and we had to wear polo shirts and khakis. Now that I'm going into high school I have no use for these plain shirts except to cut them up and make something out of them. I'm a Directioner and I saw this shirt online:
It was instant love.
To change a boring old polo into a rockin' 1D shirt, keep reading.
Get the polo (turned inside out), . . .
and I used another tank as a guide, so place it on top.
( be sure to pin them together to avoid moving)
Outline the tank with a pencil onto the polo.
Now flip them back over and repeat.
Now just cut on the lines . . .
Follow the instructions to hem on my Shoulderless Refitted Shirt tutorial. Then sew it down.
This will be the result:
Now for the 1D:
Start by getting some interfacing and cut a piece big enough to cover where you want the 1D to be.
Draw on the desired picture. (Be sure to put the side that turns sticky once ironed is on the opposite side. Otherwise if the sticky side is up then the 1D is backwards. The picture below shows the sticky side facing the ironing board, not the camera. Please comment if that is confusing.)
After cutting out the interfacing, cut out the same shapes onto desired fabric.
Sew interfacing to fabric. (I just sewed a line down the middle. You don't need to go all the way around the letter/number, just enough to keep them together (purple))
Now sew the 1D to the shirt by going all the way around them in an outline. (green)
finished! (I ended up cutting the bottom off )
June 5, 2012
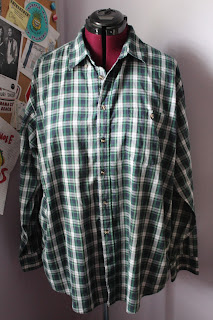
I found this plaid men's button-down at Goodwill for $1 and figured I could upcycle it to fit me. I don't know why I felt the need to buy it, probably because it reminded me on Liam Payne :), but here it is:
Before & After
I cut out the shoulders first but you can do it afterwards too.

Fold the shirt in half with the front on the outside (see picture). Make sure you line up the seams where the arms meet the shirt. Then draw a line staring at the collar and going all the way to the seam where the arm is.
Cut out on the lines you just drew.
Now it's time to fit the shirt:
Turn the shirt inside out, then put it on. pin the down the sides and arms to fit you.
Now just sew where the pins are.
Then flatten the seam and iron it down.
Sadly, my shirt was still too long. Next comes the hemming:
I took about 1 1/2 inches the bottom.
Pin it down.
 And Sew!
Now you have a finished, fitted shirt!


No comments:
Post a Comment